Reprojection of existing 360 JPGs into cube-like reprojected images
ODMax allows for immediate reprojection of your 360 images into a cube-like reprojection. You can do so by passing several options, as demonstrated below in the help of the command-line utility.
[1]:
!odmax --help
Usage: odmax [options]

Options:
  -h, --help            show this help message and exit
  -i INFILE, --infile=INFILE
                        Input video file, compatible with OpenCV2. Place path
                        between " " to ensure spaces are interpreted
                        correctly.
  -o OUTPATH, --outpath=OUTPATH
                        Directory to write output files (default: "."). Place
                        path between " " to ensure spaces are interpreted
                        correctly.
  -p PREFIX, --prefix=PREFIX
                        Prefix to use for written image files (default:
                        "still").
  -c ENCODER, --encoder=ENCODER
                        encoder to use to write stills (default: jpg). Can be
                        "jpg", "bmp", "jp2", "png" or "webp".
  -s START_TIME, --start-time=START_TIME
                        Start time in seconds from start of movie (default:
                        0.0).
  -e END_TIME, --end-time=END_TIME
                        End time in seconds from start of movie (default: end
                        of movie).
  -d D_FRAME, --frame-interval=D_FRAME
                        Frame step size (default: 1, integer). 1 means all
                        frames between start and end time are processed, 2
                        means every second frame is processed, etc.
  -r, --reproject       Reproject 360 degree stills to cube with 6 faces
                        (default: not set, i.e. no reprojection is performed).
  -f FACE_W, --face-width=FACE_W
                        Length of faces of reprojected cube in pixels
                        (default: not set, the optimal resolution will be
                        estimated from the video file). Only used in
                        combination with --reproject.
  -m MODE, --mode=MODE  Mode of reprojection interpolation, can be "bilinear"
                        or "nearest" (default: "bilinear"). Only used in
                        combination with --reproject.
  --overlap=OVERLAP     Overlap in cube faces in ratio of face length without
                        overlap. (default: 0.1). This setting ensures that
                        each face shares part of its objective with its
                        neighbouring faces. Only used in combination with
                        --reproject.
Import packages
let’s first import the necessary packages for this notebook
[2]:
%matplotlib inline
import os
import odmax
import cv2
import numpy as np
import py360convert
import odmax
import matplotlib.pyplot as plt
Command-line processing including projection
We show an example with the video forest.mp4 from the examples folder. We extract frames once every second, and on-the-fly reproject the frames on a cube-like projection. Please note that we also write the results into a temporary folder on your home directory, so please delete these afterwards. The command issued at the end of the next code-block essentially does the following:
-r: indicate that reprojection should be done-f 1024: in reprojection, each face will be 1024 pixels long-m bilinear: the mode of resampling is bilinear (but can also be nearest)-s 0: we start extraction at zero seconds-e 1: we end extraction at 1 seconds-d 5: we extract every 5th frame
[3]:
video_file = os.path.join("..", "examples", "forest.mp4")
path_out = os.path.join("..", "tmp")
# make the output path if it doesn't exist
if not(os.path.isdir(path_out)):
    os.makedirs(path_out)
print(f"Processing {video_file} and writing outputs to {os.path.abspath(path_out)}")
# !odmax -r -f 1024 -m bilinear -s 0 -e 1 -d 5 -i "$video_file" -o "$path_out"
Processing ../examples/forest.mp4 and writing outputs to /home/docs/checkouts/readthedocs.org/user_builds/odmax/checkouts/stable/tmp
More control over processing
It is also possible to have more control over what odmax does by using the API. Below, we show that we can also control this process interactively, and read 360-stills and reproject that to a 6-directional cube-like projection if we like.
Let’s first open our video file
[4]:
Video = odmax.Video(video_file)
print(Video)
Warning: No time information found in GPS track of ../examples/forest.mp4. Skipping GPS parsing.
<odmax.api.Video object at 0x7f94beaa8c40>
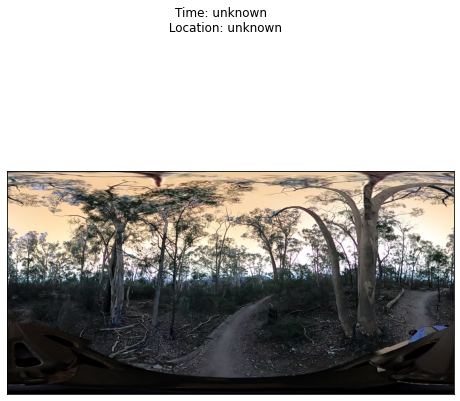
We see a warning message, because this video does not contain any GPS information. That won’t mean we cannot extract frames. Below, we extract the 20th frame without any reprojection
[5]:
f = Video.get_frame(20)
f.plot()
[5]:
(<Figure size 576x576 with 1 Axes>, <AxesSubplot:>)
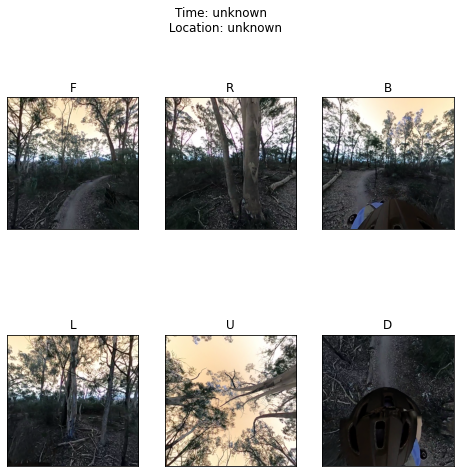
We can also do reprojection, so that we get 6 cube-directions instead of one 360-degree image. let’s show that below. Note that this also allows for manipulating the reprojection parameters if you want to..
[6]:
f = Video.get_frame(20, reproject=True, face_w=1024, mode="bilinear")
f.plot()
[6]:
(<Figure size 576x576 with 6 Axes>, <AxesSubplot:title={'center':'D'}>)
Finally we can also store the results. You need to provide a path, file prefix and encoder you wish to use. If your frame holds cube projected images, 6 images will automatically be produced. Below we store the results and demonstrated that output files are present.
[7]:
import glob
out_path = "stills"  # relative path to outputs
encoder = "jpg"
prefix = "forest"
if not(os.path.isdir(out_path)):
    os.makedirs(out_path)

f.to_file(path=out_path, prefix=prefix, encoder=encoder)

print("Files produced")
print("==============")
glob.glob(os.path.join(out_path, f"{prefix}*"))
Files produced
==============
[7]:
['stills/forest_0020_D.jpg',
 'stills/forest_0020_R.jpg',
 'stills/forest_0020_U.jpg',
 'stills/forest_0020_F.jpg',
 'stills/forest_0020_B.jpg',
 'stills/forest_0020_L.jpg']